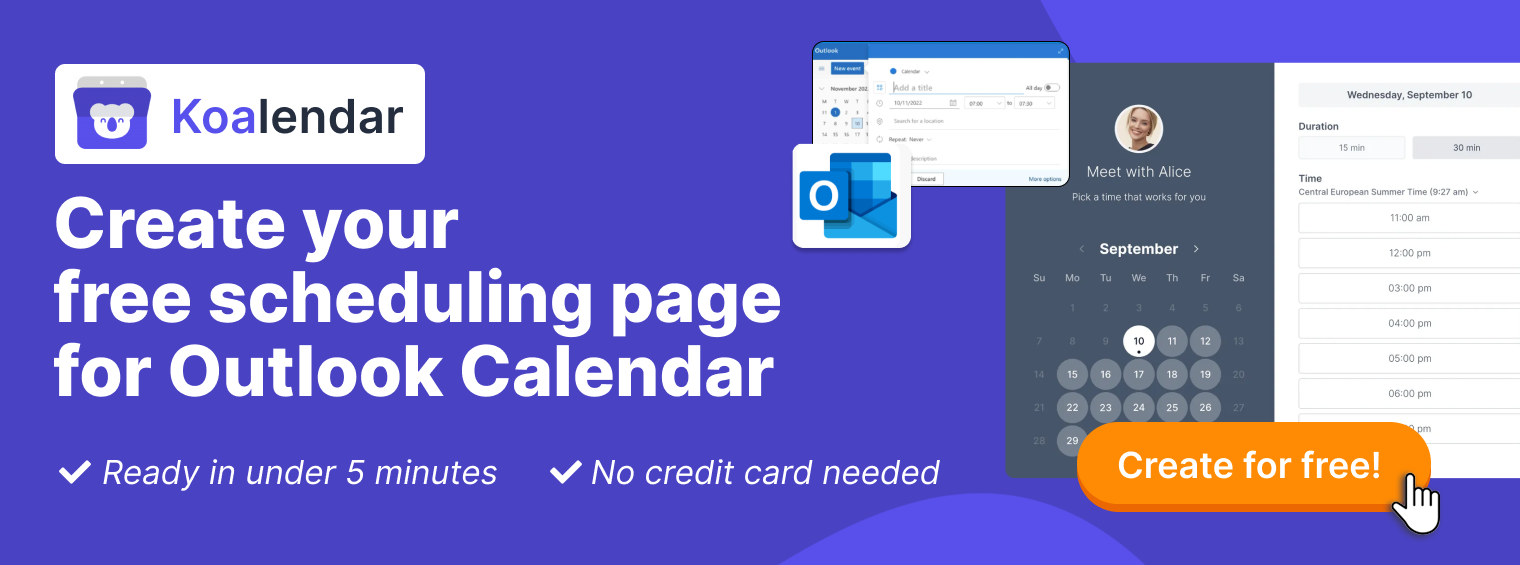

TL;DR
- Sharing your calendar on Outlook (Windows, web, Mac, and iPhone) helps others see when you’re free so you avoid back-and-forth messages and get bookings faster.
- With Outlook calendar sharing settings, you control who sees only busy times, basic details, or full event info, and you can also share with external users or publish Outlook calendar as a view-only link.
- Here, you’ll learn how to send an Outlook calendar invite for one-off meetings, how to stop sharing Outlook Calendar, and how to view the shared calendar in Outlook on any device.
- On top of that, you can add a professional appointment booking system like Koalendar for real-time calendar sync, automatic time zone detection, and much less admin work. Sharing your availability in Outlook should be simple, but it can often feel confusing.
You “google” how to share my calendar on Outlook or how to send Outlook calendar invite, click through menus, and still worry you shared the wrong thing with the wrong people.
Meanwhile, co-workers keep asking when you are free, clients wait for confirmations, and you find yourself running between different devices and external partners without a clear process.
This guide will show you how to share and publish your Outlook calendar, send and forward Outlook calendar invites, manage permissions, and use a professional appointment booking system like Koalendar to handle scheduling for you.
How Outlook calendar sharing works and when you need to do it
To make the most of Outlook, you need to understand what you’re really sharing when you open up your calendar, and how that small change can change how people work with you.
What is calendar sharing?
Calendar sharing is showing your calendar to other people in a controlled way, which lets them see when you’re busy, what time slots work for you both, and simplifies scheduling all types of meetings.
Say you open Outlook on a busy Monday. Your calendar is full, your inbox is full, and three people ask, “When are you free this week?” Sounds like a nightmare, right?
Calendar sharing is how you stop that loop. You choose:
- Who can see your calendar
- Which calendar they see (work, project, personal work calendar)
- How much detail they see (just busy times, basic info, or full details)
Once you share the calendar, people don’t need to guess anymore. They open the link, see when you’re available, and schedule a call.
Why share your calendar?
Sharing your calendar helps you spend less time coordinating and more time actually working. Here are a few simple examples:
- You onboard a new teammate. Instead of asking for your availability each time, they check your shared calendar and book a slot that fits you both.
- You’re a freelance language tutor. Instead of trading messages with every new student, you share a simple view of your calendar so they can suggest times that actually fit your real availability.
- You run a small spa. Your receptionist checks your shared Outlook calendar before confirming appointments, so they never book a facial over your blocked “admin” hour or lunch break.
An open calendar lets you reduce back-and-forth emails, avoid double bookings and scheduling conflicts, and makes it easier for others to respect your time. Once you set up sharing properly, your calendar starts doing a bit of coordination work for you in the background.
How to share my calendar on Outlook
Before you set up a booking system or send invites, first make sure your Outlook calendar is shared in a way that actually matches how you work. Here’s how to do it on each device.
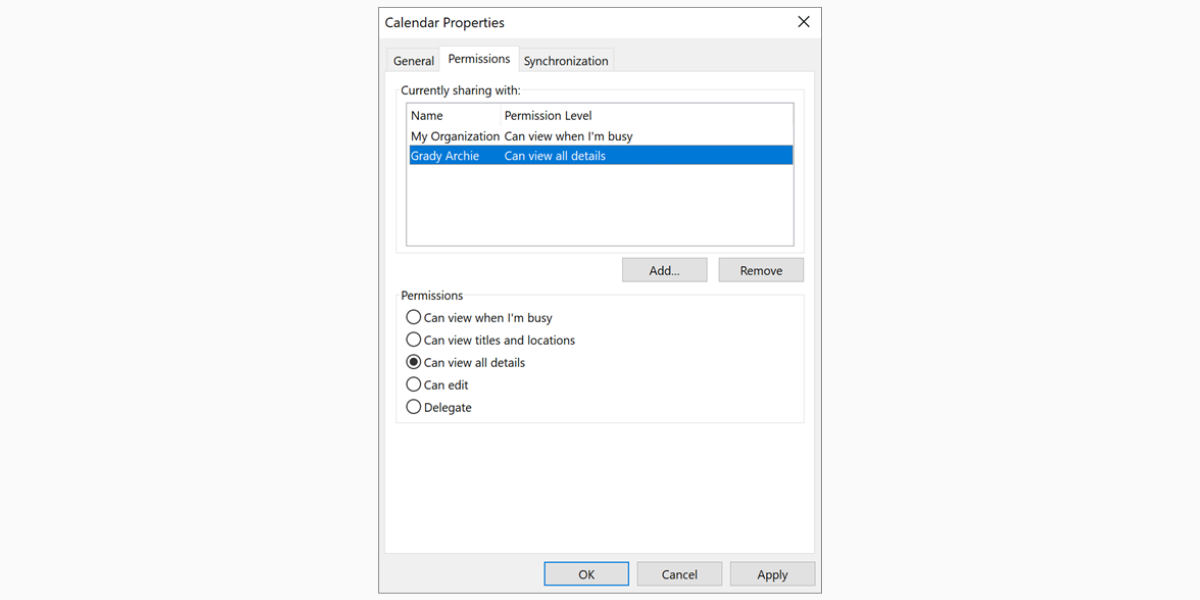
1. Sharing your calendar on Windows
Use this if you mainly work from the Outlook desktop app on your computer.
To share your calendar on Windows:
- Open Outlook and switch to the Calendar view.
- In the left panel, right-click Calendar (or the calendar you want to share).
- Select Sharing Permissions or Properties > Permissions.
- Click Add…, then type the name or email of the person you want to share with.
- Choose their permission level (for example, Can view when I’m busy or Can view all details).
- Click OK or Share to confirm.
Example:
You run a small spa and want your receptionist to see all your bookings. Share your main calendar with them and set their permission to Can view all details so they can see treatment types and client names, not just “busy” blocks.
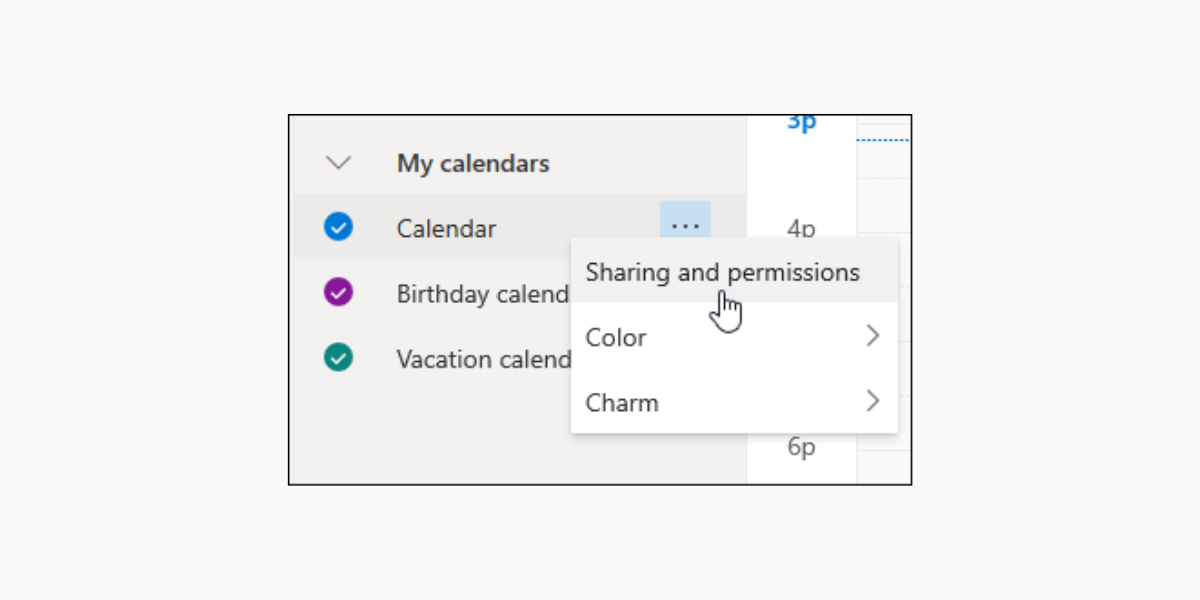
2. Sharing your calendar on Outlook Web
If you often use Outlook in your browser (web version), this is the quickest way.
To share your calendar in Outlook on the web:
- Go to Outlook on the web and click the Calendar icon at the bottom of the page.
- Under My calendars, right-click the calendar you want to share.
- Select Sharing and permissions.
- Enter the person’s name or email address.
- Choose their permission level from the dropdown.
- Click Share.
Example:
You’re a freelance language tutor and work with a small group of teachers. You share your “Teaching” calendar with them via Outlook web so they can see when you’re free to cover classes, without needing to ask every time.
3. Sharing your calendar on Mac
If you use Outlook on a Mac, the idea is the same, but labels look slightly different. To share your calendar on Outlook for Mac:
- Open Outlook and switch to Calendar.
- In the list of calendars, Control-click (or right-click) your calendar.
- Select Sharing Permissions.
- Click the + button to Add user.
- Search for the person and select them.
- Choose the permission level (for example, Reviewer for view-only, or Editor if they should help manage your calendar).
- Click Done.
Example:
You’re a handyman who uses Outlook on a Mac in the office, while your partner handles calls. You give them Editor access so they can add new jobs to your calendar and reschedule bookings using the templates provided in this article, if a job runs long.
4. Sharing your calendar on iPhone (Outlook app)
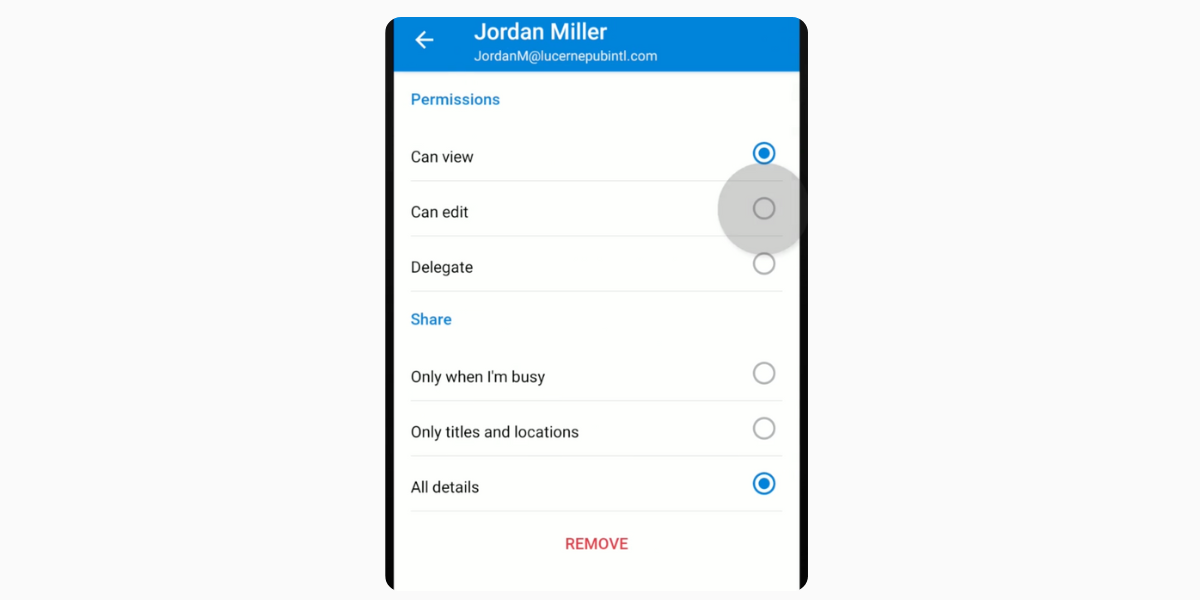
Many small business owners live in the Outlook mobile app. You can manage sharing there too. To share your calendar in the Outlook mobile app:
- Open the Outlook app and tap the Calendar icon in the upper left corner menu.
- Tap your profile icon or the calendar menu to see your list of calendars.
- Tap the settings gear next to the calendar you want to share.
- Choose Add people or Sharing (wording may vary).
- Search for the person and tap their name.
- Choose their permission level, then tap the checkmark or Done.
Example:You run a mobile beauty service and spend most of your day on the road. You share your calendar from your phone with your assistant so they can see your schedule in real time while they answer WhatsApp and phone inquiries.
5. Bonus: How to share Outlook calendar with external users
Sometimes you need to share your availability with people outside your company or organization. For example, your accountant, a contractor or freelancer you hire, or a partner business that sends you clients.
You have two main options here, depending on what your Microsoft 365 admin allows:
- Share directly with an external email:
- In Outlook on the web, follow the normal sharing steps and enter the external email address.
- If your organization allows external sharing, they’ll receive an email invite and can add your calendar to their own.
- Publish your Outlook calendar (view-only link):
- In Outlook on the web, go to the top bar and choose Settings > Calendar > Shared calendars.
- Look for Publish a calendar.
- Choose which calendar to publish and pick the detail level (for example, “Can view when I’m busy” or “Can view all details”).
- Copy the HTML link (for viewing in a browser) or the ICS link (for subscribing in their calendar app).
- Send that link to clients, partners, or anyone who needs to see your availability.
Example:
You own a small training studio and work closely with a local physio clinic. You publish a view-only version of your schedule and share the link with the physiotherapists, so they can suggest times that match your open slots when they refer clients to you.
Setting permissions and access levels
Once you start sharing your Outlook calendar, the real power comes from choosing the right level of access for each person.
This way, you’ll keep your schedule useful for others without oversharing sensitive details. This is particularly important for handling client data, as it builds trust with your customers, but also helps you comply with strict data privacy rules.
Use this quick table as a guide when deciding what level to give each person. These Outlook calendar sharing settings help you understand and control who sees what:
| Recommended level | What they see or can do | Best for | |
| One-off client or customer | Can view when I’m busy or published link | Sees only free/busy blocks, no details | Letting clients suggest times without exposing other bookings |
| Regular clients (e.g., class members, retainer clients) | Can view limited details | Sees event titles like “Spanish class” or “Massage session” but not full notes | Giving repeat clients a simple view of when you’re available |
| Receptionist or front-desk staff | Can view all details or Can edit | Sees all appointment info; can adjust times and add bookings | Small spa, clinic, or studio where staff handles scheduling for you |
| Business partner or co-owner | Can edit or Delegate / Co-owner | Manages your calendar with you; can reschedule and sometimes respond to invites | Running a studio, agency, or practice together |
| Freelancers or external partners | Can view when I’m busy to start | Sees when you’re free or busy, not the contents | Coordinating joint projects without sharing client names or details |
| Internal team (instructors, tutors, technicians) | Can view all details | Sees your full schedule so they can plan around your key sessions | Aligning team availability and avoiding clashes with important sessions |
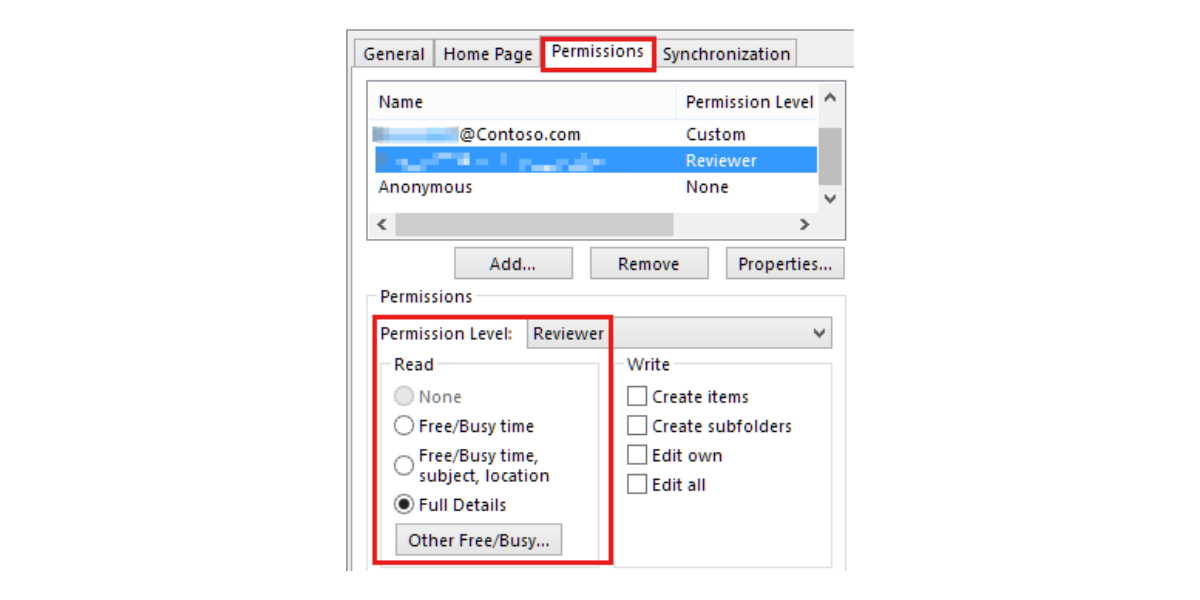
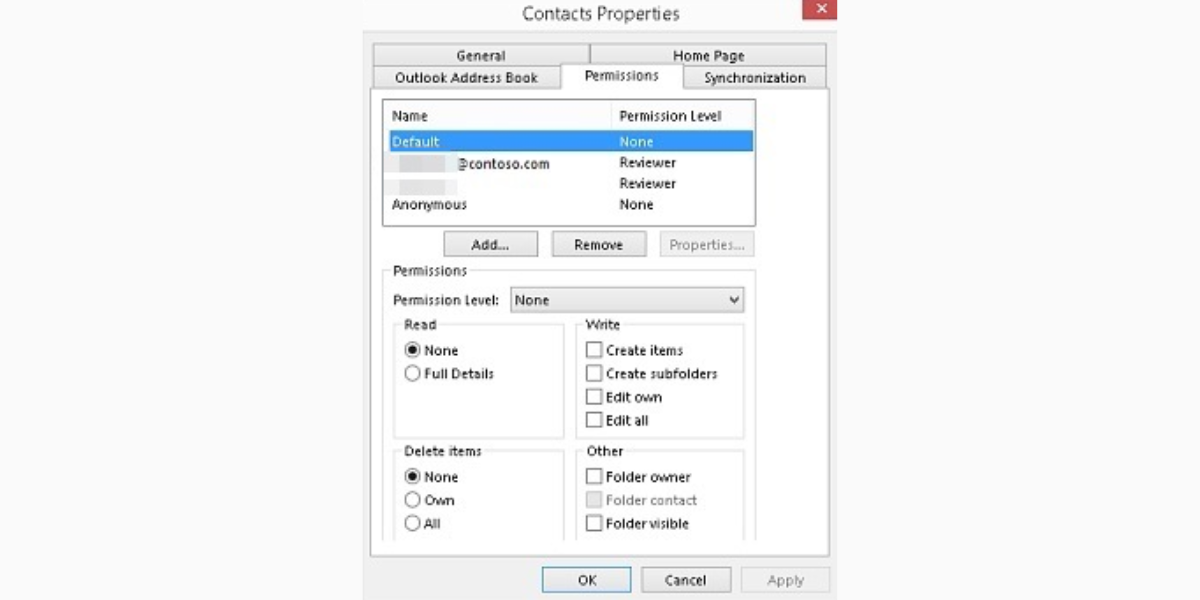
Here’s what the panel looks like in Windows:
Our best tip: When in doubt, start with less access (view only) and increase it if someone truly needs more control. You can always adjust or remove permissions later if your team changes or your business grows.
How to send Outlook calendar invites
Sharing your whole calendar is useful, but sometimes you just need to lock in one specific meeting. That’s where Outlook calendar invites come in.
The basic steps are almost the same across Outlook on Windows, Mac, web, and mobile.
To create a calendar invite:
- Open Outlook and switch to the Calendar view.
- Click or tap New event / New meeting / + (wording depends on your app).
- Add a title (for example, “Spanish class – Ana” or “Full body massage – Mark”).
- Choose the date, start time, and end time.
- Add a location (your studio address, “Online – Zoom,” or “Phone call”).
- Add any notes your guest should see (what to prepare, payment info, address details).
Once the event is set up, you need to send it so it appears on the other person’s calendar.
To send the calendar invite:
- In the event window, find the Guests / Invite attendees / To field.
- Type the email address of each person you want to invite.
- (Optional) Use the Scheduling Assistant / Find a time feature if you’re on desktop or web to check when everyone is free.
- Double-check the time zone, especially if you work with clients in other countries.
- Click or tap Send.
Outlook emails the invite and adds it to your calendar. When your guest accepts, it appears on their calendar too.
Example: You run a beauty salon. A new client calls to book a facial. You create an event, add their email, and click Send. They get the confirmation with time, address, and any prep instructions right in their inbox and calendar.
How to stop sharing your Outlook calendar
Business changes, teams grow, and sometimes you no longer want certain people to see your calendar. You don’t need to start from scratch, just update or remove their access.
Windows (desktop)
1. Open Calendar in Outlook.
2. Right-click your calendar and select Sharing Permissions or Properties > Permissions.
3. Select the person you want to remove or downgrade.
4. Click Remove, or choose a more limited permission level (for example, from “Can edit” to “Can view when I’m busy”).
5. Click OK.
Outlook Web
1. Go to Calendar in your browser.
2. Right-click your calendar and select Sharing and permissions.
3. Find the person, then either change their permission level or select Remove / Trash icon.
4. Save your changes.
Mac
1. Open Calendar in Outlook.
2. Control-click your calendar and choose Sharing Permissions.
3. Select the person and click - or change their role.
4. Click Done.
Published calendar (web)
1. Go to Settings > Calendar > Shared calendars in Outlook on the web.
2. Find your published calendar and choose Stop publishing or remove the link.
For example, if you worked with a freelance marketer and gave them full calendar access, you will want to end calendar sharing when the contract ends and remove the permissions so the freelancer no longer sees your bookings.
How to view a shared calendar in Outlook
Sometimes you’ll be on the other side. You receive access to someone else’s calendar and want to see it in Outlook. Adding it once makes planning with that person much easier.
For example, if you’re a small clinic owner, your receptionist may accept your shared calendar invitation on their computer and phone. Now they can see your schedule alongside theirs and avoid overlap when booking patient appointments.
The steps to view a shared calendar are as follows:
From an email invitation
1. Open the calendar sharing email you received.
2. Click Accept or Add calendar.
3. Outlook adds the calendar to your list, usually under Shared calendars.
Outlook on Windows
1. Open Calendar.
2. Select Add Calendar or Open Shared Calendar (depending on your version).
3. Type the person’s name or email.
4. Select their calendar and click OK.
Outlook on the web
1. Open Calendar in your browser.
2. Click Add calendar > Subscribe from web or Add shared calendar.
3. Enter the person’s email address or paste an ICS link if they shared a published calendar.
4. Click Import / Add.
Outlook mobile
1. Open the Outlook app and go to Calendar.
2. If you received an invite email, open it and tap Add calendar or Accept.
3. Or, go to the calendar list / settings, choose Add shared calendar, and search for the person.
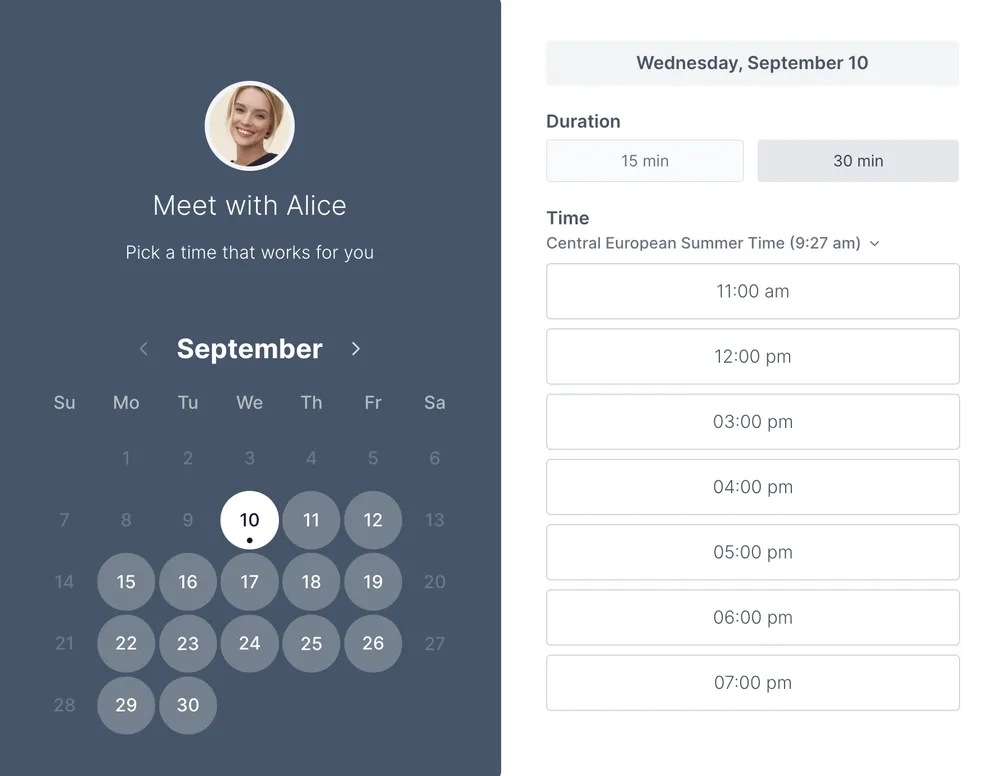
Adding a professional appointment booking system to Outlook: how Koalendar helps
Sharing your Outlook calendar is great for internal coordination. But once you work with clients, you need a professional appointment booking system that sits on top of Outlook and does the heavy lifting for you.
Koalendar connects directly with your Outlook calendar for real-time calendar sync with Outlook.
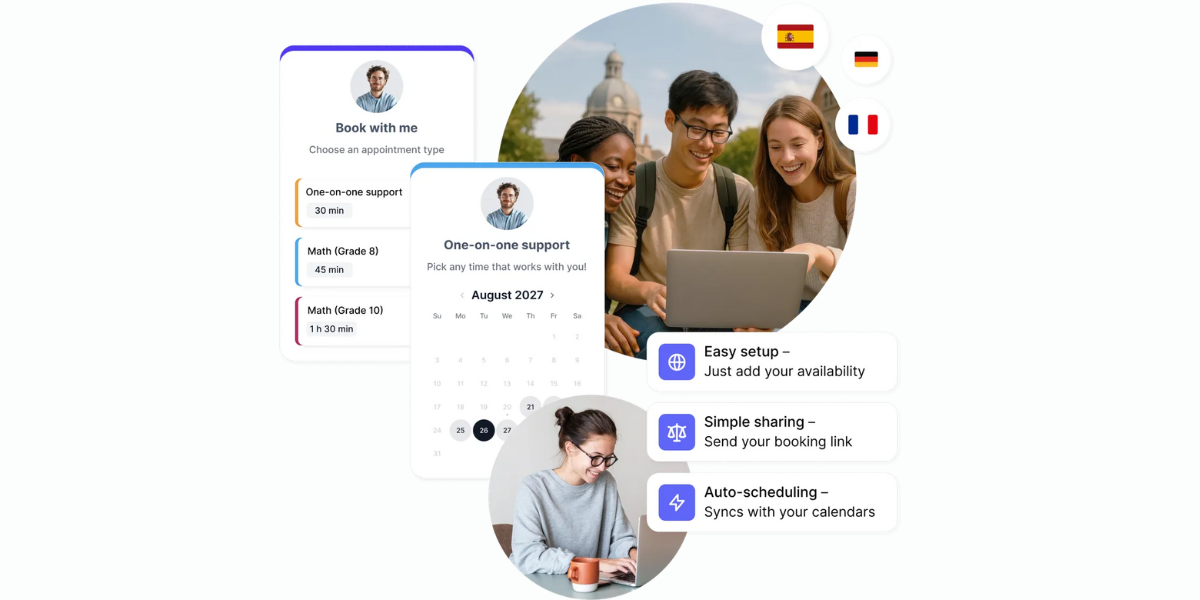
Here’s what Koalendar for Outlook does for you:
- Syncs availability in real time: When someone books through Koalendar, your Outlook calendar updates instantly and vice versa. No manual copy-paste.
- Shows the right time zone to everyone: Koalendar automatically detects your client’s time zone. The client sees slots in their local time, while you still see everything in yours.
- Lets you set smart availability rules: Block lunch, travel time, or admin hours from Koalendar while still managing your days from Outlook. You decide which slots are bookable and how far in advance people can schedule.
- Works for teams, not just individuals: Koalendar lets you manage the availability of your entire team on shared booking pages. Outlook stays your source of truth; Koalendar makes it easy for clients to book the right person at the right time.
- Reduces back-and-forth and admin time: Instead of emailing times, your clients simply choose a slot on your Koalendar page. They get instant confirmation and reminders, and you get fewer no-shows and scheduling headaches.
- Integrates with all your favorite tools: Connect Koalendar with your calendar apps, video conferencing software, payment platforms, and more to create an integrated ecosystem and save time on admin tasks.
- Keeps your brand’s look and feel: You can use your own booking link, logo, and brand colors to ensure trust and maintain consistency for your brand, as well as modify the page text to match your tone and voice.
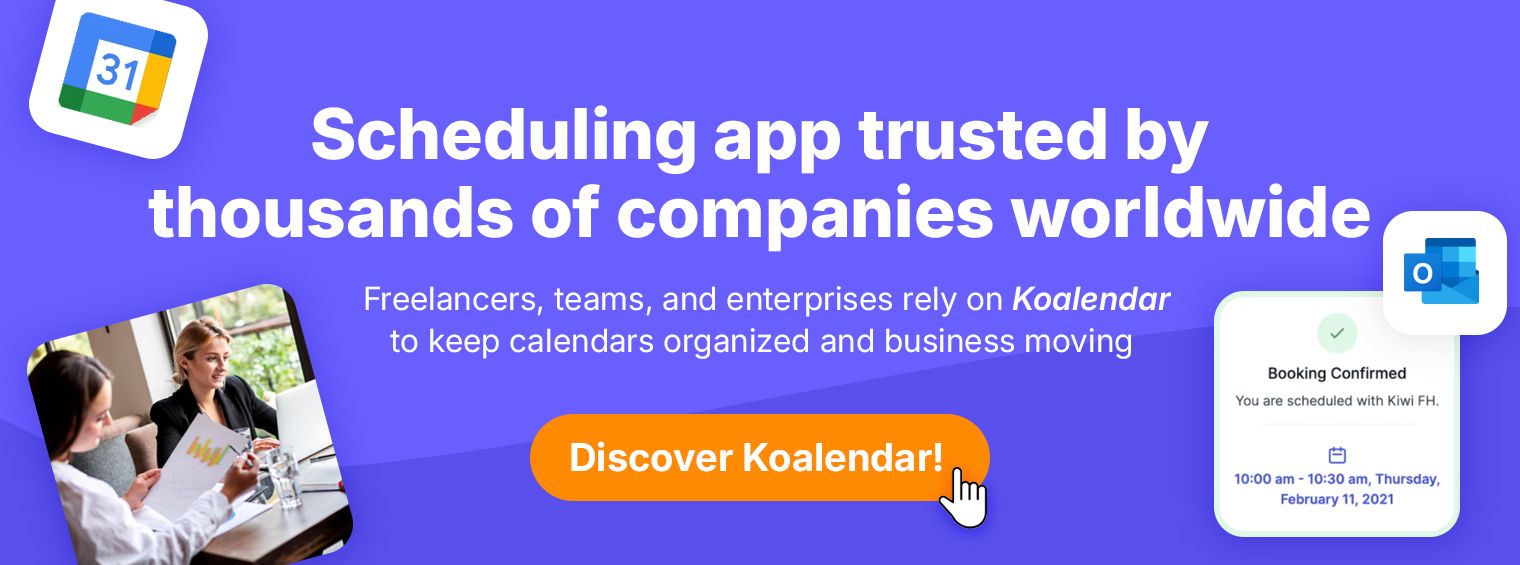
Outlook keeps your schedule organized. Koalendar turns that schedule into an easy, self-serve booking experience for everyone you work with — you can start with a Free Forever plan and add more features as your needs grow.
Streamline calendar sharing with Koalendar
Outlook calendar sharing helps people see when you’re free, sends clear invites, and keeps your small business more organized. Once you add the right permission levels and know how to stop sharing or view shared calendars, scheduling becomes much easier.
Try Koalendar free and see how it complements your full business toolkit. Start using Koalendar for free today and turn your Outlook calendar into a simple, professional booking system that your clients and you will love.